Made for Acme
Monday, October 16, 2006
Thursday, August 24, 2006
Monday, August 21, 2006
SAP Business Forum
SAP Business Forum 2006 Project made for WAY - Marketing e Logística SA (www.way.pt)
SAP Business Forum 2006 Project made for WAY - Marketing e Logística SA (www.way.pt)
Monday, July 31, 2006
Wednesday, July 05, 2006
THE CHAIN


Hello. This is a simple tutorial to make a chain in 3D Studio Max 7.0. When making in later versions there might be some diferences in the button names and so on, but the principle is the same. Good work!
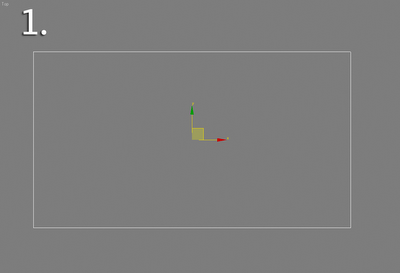
Make a rectangle with the aproximate size of a chain link, but just a little smaller (to compensate for the thickness) (fig.1)
Apply an Edit spline modifier. Go to the vertex sub-object level, select all vertex and do a "fillet" to the maximum possible. Select the vertex that are close together and apply "fuse" and "weld" to make them as only one. Do the same to the other set (don't apply at the same time to all the vertex). (fig.2)
Go down in the modifier stack to the base object (rectangle). Open the rendering tab and enable "renderable" and "display render mesh". Set the thickness you need. Using "sides" and "steps" (in the interpolation tab), set the level of complexity of the mesh (normal, low or high poly) (Fig.3)
Apply a metal material to the chain link. In this case I used a basic "metal chrome" from the material library. (fig.4)
Second Part: doing a complete chain
Draw a line to make a path for the chain. Don't forget to turn off the "renderable" and "display render Mesh" in this one. Make a clone of the link as a copy. With this one slected, go to the tools menu and select "spacing tool". Press the "Pick path" button and select the path you've just made. In the context group, enable "follow". Choose "instance" as the type of object. In the Parameters group, increase the count until the links are close to each other, leaving just a small gap. Click apply when done. Close the spacing tool. (fig.5)
Select the other chain link you've copied before. Repeat the spacing tool process using a the same path but with a slight difference: subtract a single link to the count number used before. Enable "start and end offset" and enter a value that places the starting and ending links between other links, and not at the exact same place. Press apply when done. (fig.6)
Last one! Close the spacing tool. With the same link still selected, apply an XFORM modifier. Be sure that the modifier turns yellow, wich means its gizmo is active. If not, click on it to make it so. Enable the "angle snap toggle" tool and rotate the link by 90 degrees. All its instances will follow. (fig.7)
Click the XFORM modifier to turn off the gizmo sub-level (it will turn gray). If you want, you may delete the original links and the path line. (fig.8)
Hope it works for you!
Sunday, July 02, 2006
Soccer Ball
A few months back I did a small tutorial on how to make a simple low poly Soccer ball reaaaaaly fast.
The tutorial was improved by the talented people at Turbo Squid forums so I post the thread here for you see all of it and not only the original post:
Soccer Thread
Check out this other thread for more great tips: http://www.turbosquid.com/Forum/Index.cfm/stgAct/PostList/intThreadID/22631
Cheers
The tutorial was improved by the talented people at Turbo Squid forums so I post the thread here for you see all of it and not only the original post:
Soccer Thread
Check out this other thread for more great tips: http://www.turbosquid.com/Forum/Index.cfm/stgAct/PostList/intThreadID/22631
Cheers

